Get started
What you will learn:
In this Get started tutorial, you will make a LED blink (the embedded hello world 😉) and discover all the different possibilities you have to control it. At the end, you will have a complete working environment and a network of boards interacting together. If you don't have a board from the list of compatible hardware, you can still perform this Get started directly on your computer to discover Luos technology! Pay attention to tabs at each step of the Get started that give you the specific information for board users and no-board users!
Part 1: set up your project
1. Introduction
This part will guide you through the basic essential tools' installation and how to use them.
2. Set up your development environment
We will use PlatformIO as a development environment.
- First, download and install it following the PlatformIO installation page.
- When it is done, open the VS Code editor.
- Through this Get started, you will need to enter some command lines in a terminal. You can either use the terminal from VS Code, or use your favorite one.


3. Download the base code
Download and unzip from this link the Get started base code.
Alternatively, you can clone this code through Git via the terminal, using the following command line:
git clone https://github.com/Luos-io/Get_started.git
You will need to have GIT installed on your computer to do that. If you are not familiar with Git, you can consult their documentation.
4. Build your project
Locate the project in the folder you just downloaded, corresponding to the board you will use. (For example, for the STM32L432KC Nucleo board, the folder will be Get_started/NUCLEO_L432KC)
cautionIf you don't have a board to perform this Get started, select the No-board folder to discover Luos technology on your computer.
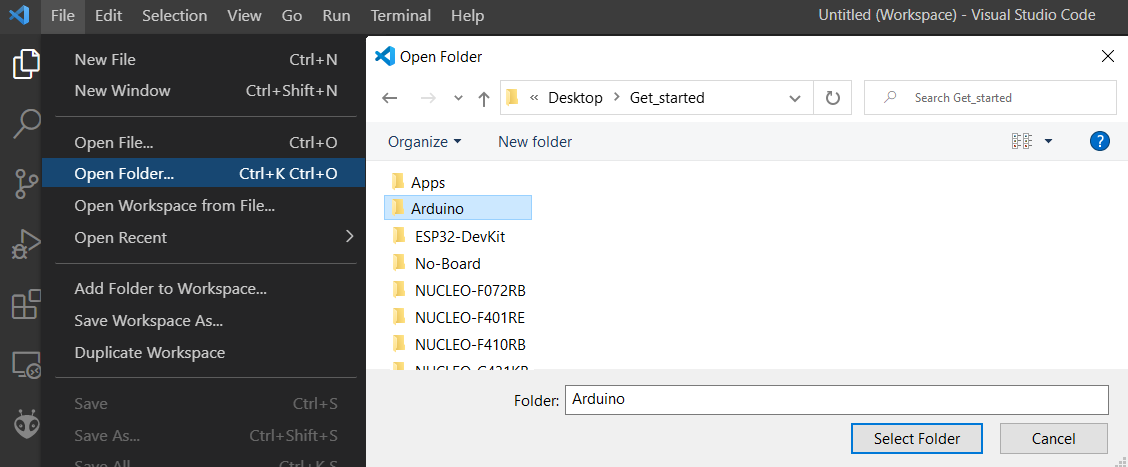
On VS Code, click on File → Open Folder and open the project folder you just located.

If VS Code displays the message “Do you trust the authors of the files in the folder?”, you can trust us 😉: check the option “Trust the authors of all files in the parent folder” so it will not pop up anymore, then click the “Yes, I trust the authors” button.
The project folder should now be opened in the PlatformIO explorer. 👍
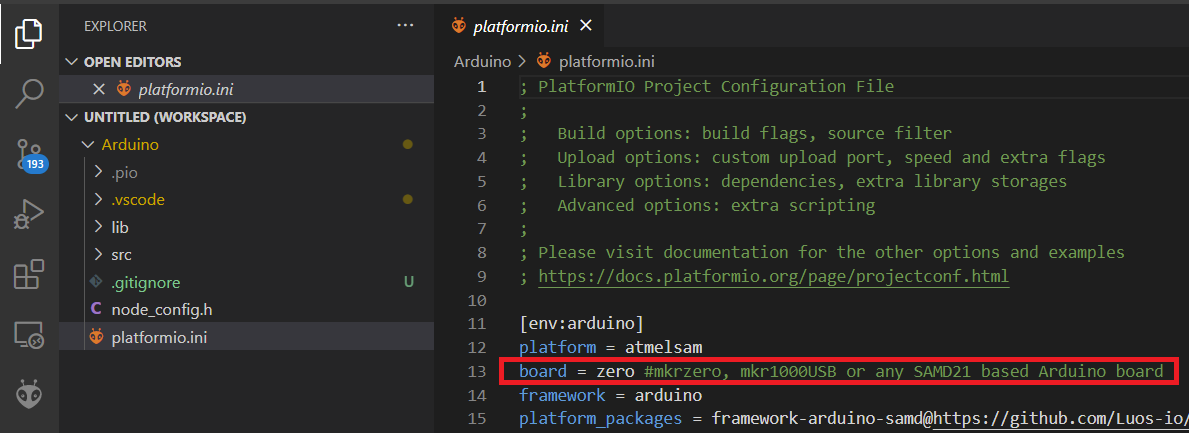
For Arduino users, you have to select the board you use in the file platformio.ini. Find board and set it to board = zero.
For the Seeeduino XIAO board, also set default_envs to default_envs = seed.

- Build the project
Click on the tick button on the bottom. Building the project creates a binary file of your code that you will upload in the next step.


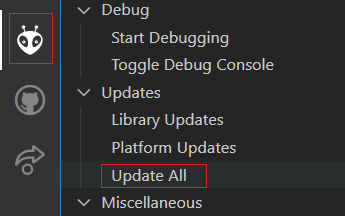
The build may sometimes output an error message. In that case, you need to update the PlatformIO libraries (click on the PlatformIO ant logo on the left, then click on Update All on the left panel as shown on the image below), and build again.

5. Upload to the board
- Board
- No board
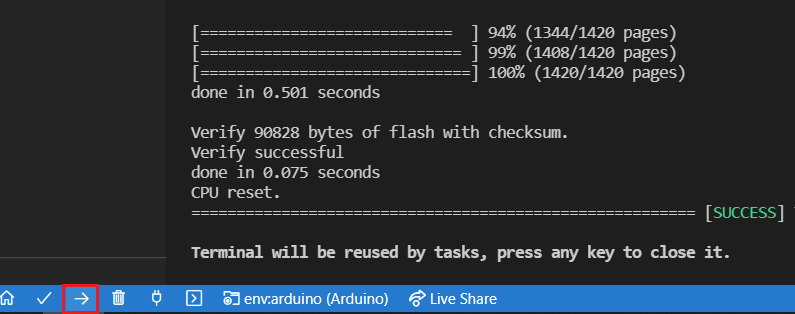
You can now flash your board: connect it to your PC with a USB cable and upload the code by clicking on the right arrow in the bottom left of the VS Code window, situated next to the build tick button (see image below). PlatformIO will build the firmware and flash the board. Take a look at the terminal to observe each step that PlatformIO follows. A success message should appear at the end. Once the board is flashed, it means the compiled binary you've created have been copied into the board and is running. You should now see the LED blinking on your board.

Some boards in this Get started may not have a built-in LED, so you must connect an external LED between the specified pin and the GND pin. E.g. for an ESP32-DevKit, you must connect a LED and a resistor between IO18 and GND (check the schematics from the table in the Get started Part 3 for hardware specification).
In order to make this step work, you may need to install the USB driver related to your board on your computer.
Note: Linux users should give USB access to their boards by modifying the udev rules access rights. To give such rights to PlatformIO, please follow this tutorial on PlatformIO FAQ section.
If you have any trouble with your board's USB driver, you can consult our related troubleshooting page. Also, make sure your USB cable is not faulty (it happens... 🤗).
Congratulations, your first Luos app is running!
When you build your application, an executable program is generated. Run the application that you just built by going in the folder Get_started\No-Board.pio\build\native and launch program.exe. In a terminal, you should see the program runing an the "LED" blinking.
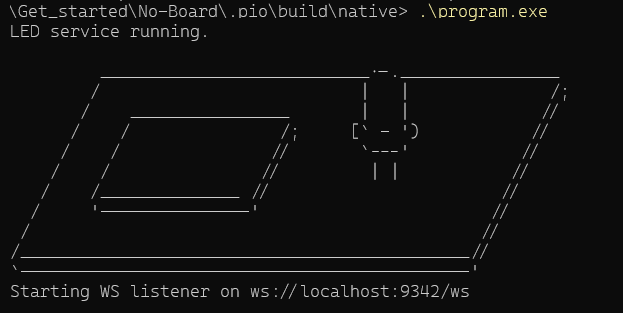

Congratulations, your first Luos app is running!
6. Explanation: What has been going on?
Two services have been loaded into your board or your computer on step 5, allowing you to make the LED blink.
- Blinker sends a message at a fixed duration.
╰ The code folder of this service is located at the root of the get_started repository (because the same app can run on any board so it's a shared folder) - Led receives this message and makes the LED blink.
╰ The code folder of this service is located on the lib folder of your project (because it is a driver which is specific to your board)
On top of it, we also added two other services allowing you to take control of your board:
- Pipe, managing a serial interface.
╰ The code folder of this service is located in the cloud (because it is a common cross-platform of Luos tools), PlatformIO just downloaded it for you. - Gate, an app that translates Luos engine's messages to JSON and sends it through the Pipe.
╰ The code folder of this service is located in the cloud (because it is a common cross-platform's Luos tool), PlatformIO just downloaded it for you.
7. Next step
Your development environment is now configured, and the Get started project is installed in a local folder of your choice. The next part of this section will teach you how to run Luos on your MCU and take control with a high level API!

